Leather Flower Tutorial
This post contains affiliate links. When you purchase items from certain links, at no additional cost to you, I receive a commission. For more information, please see my legal page.
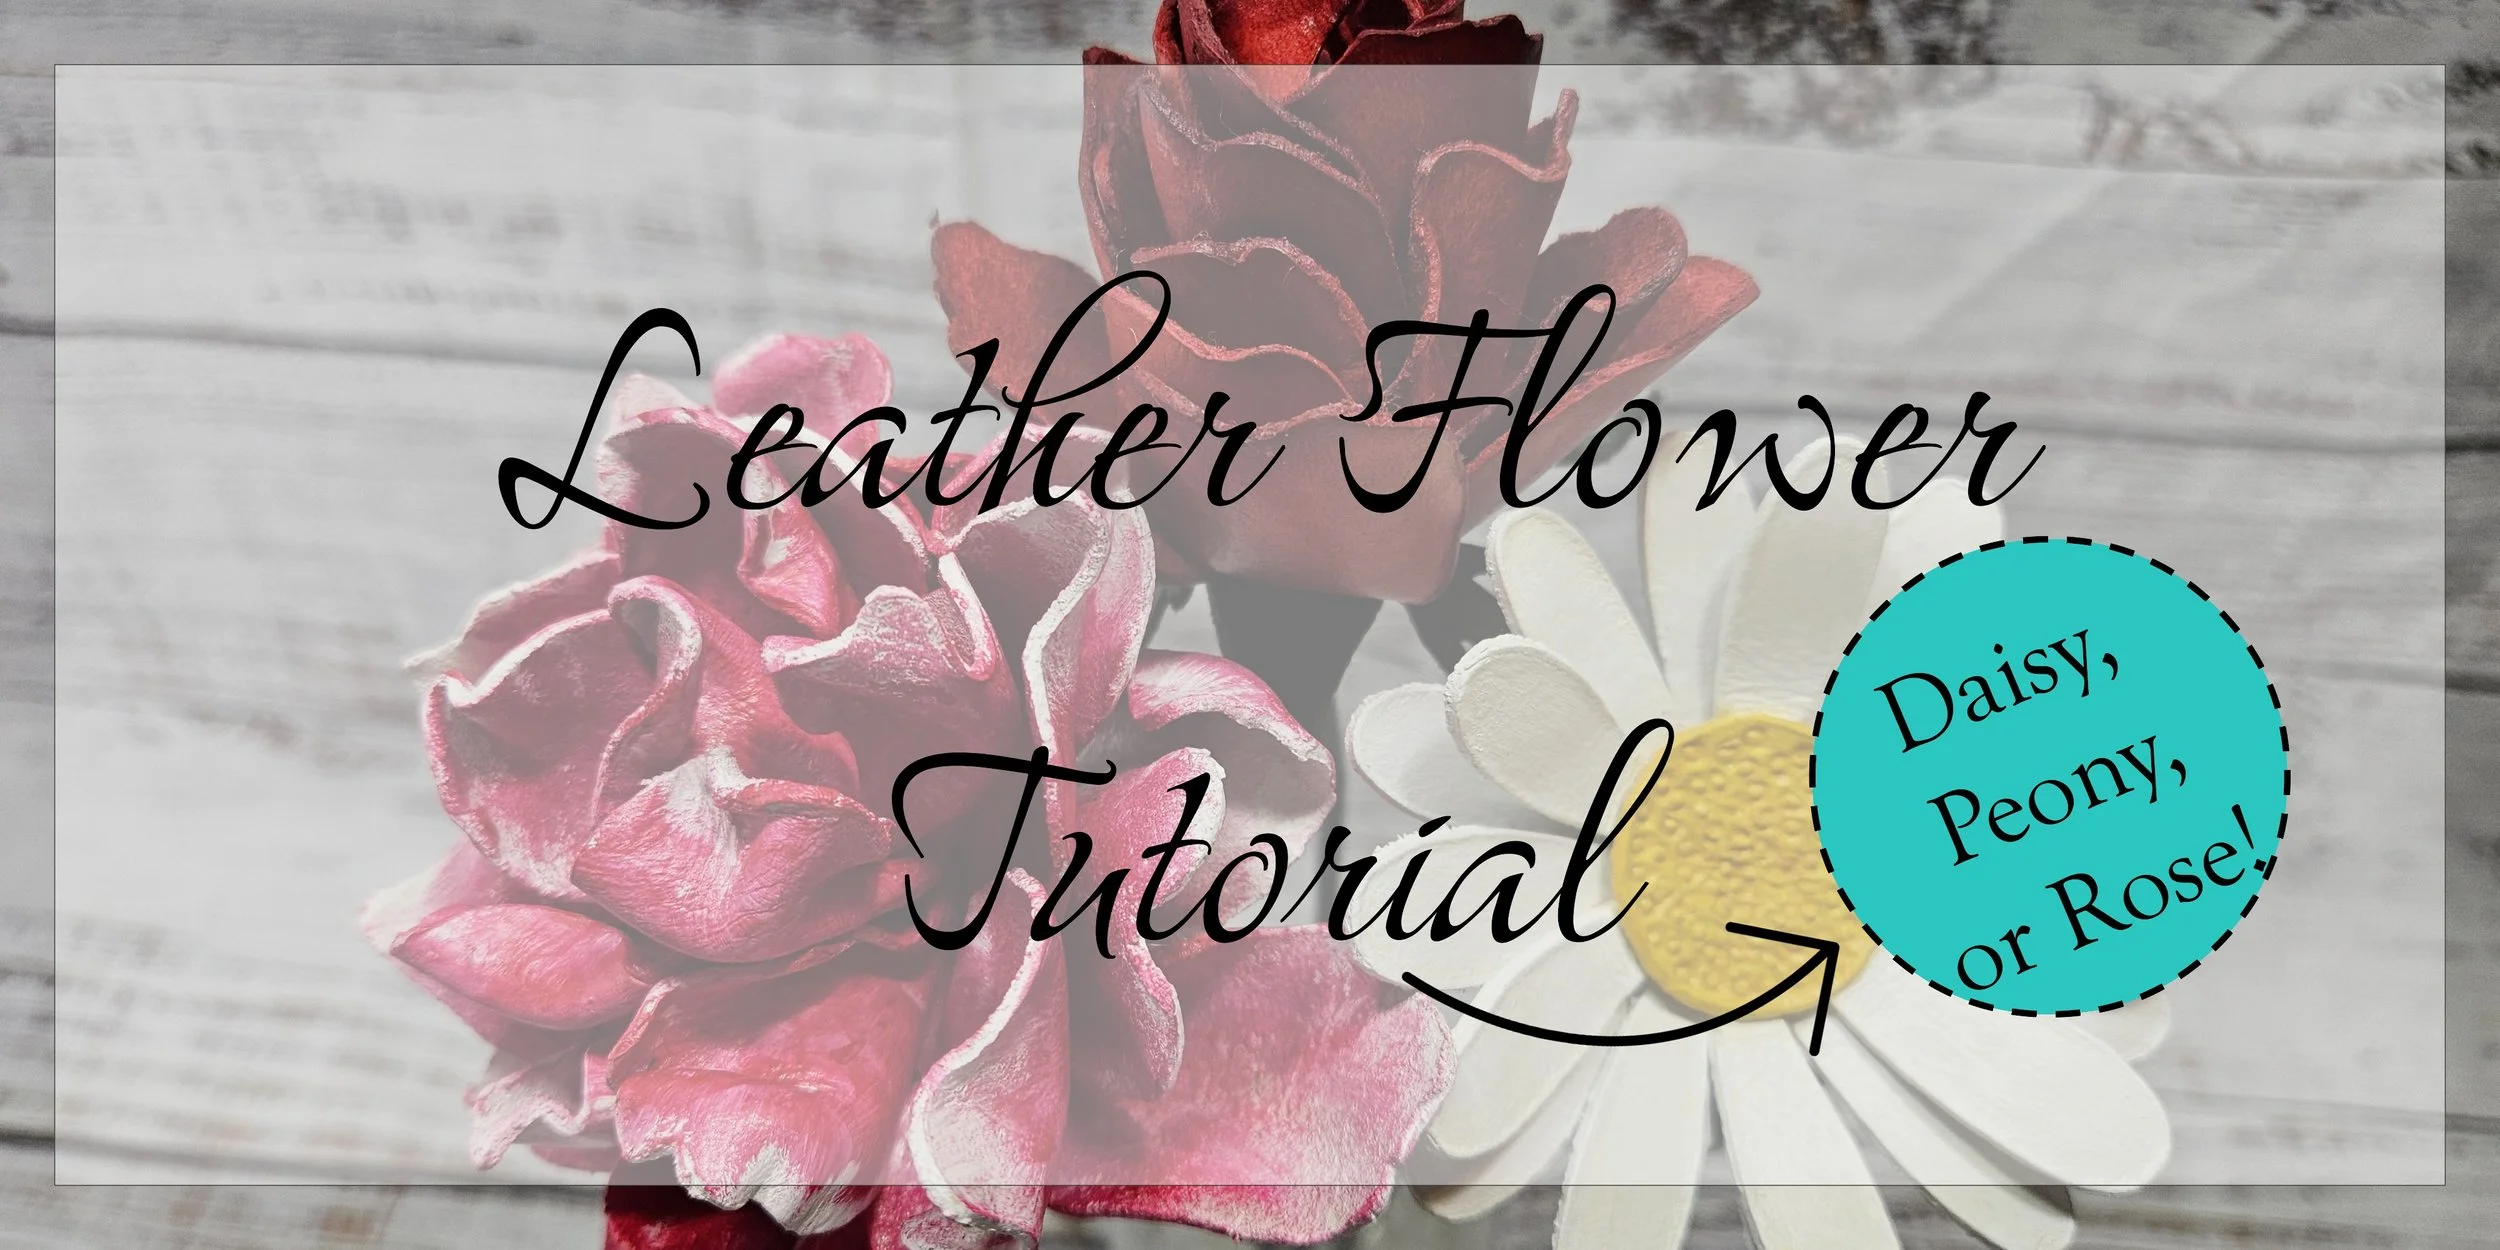
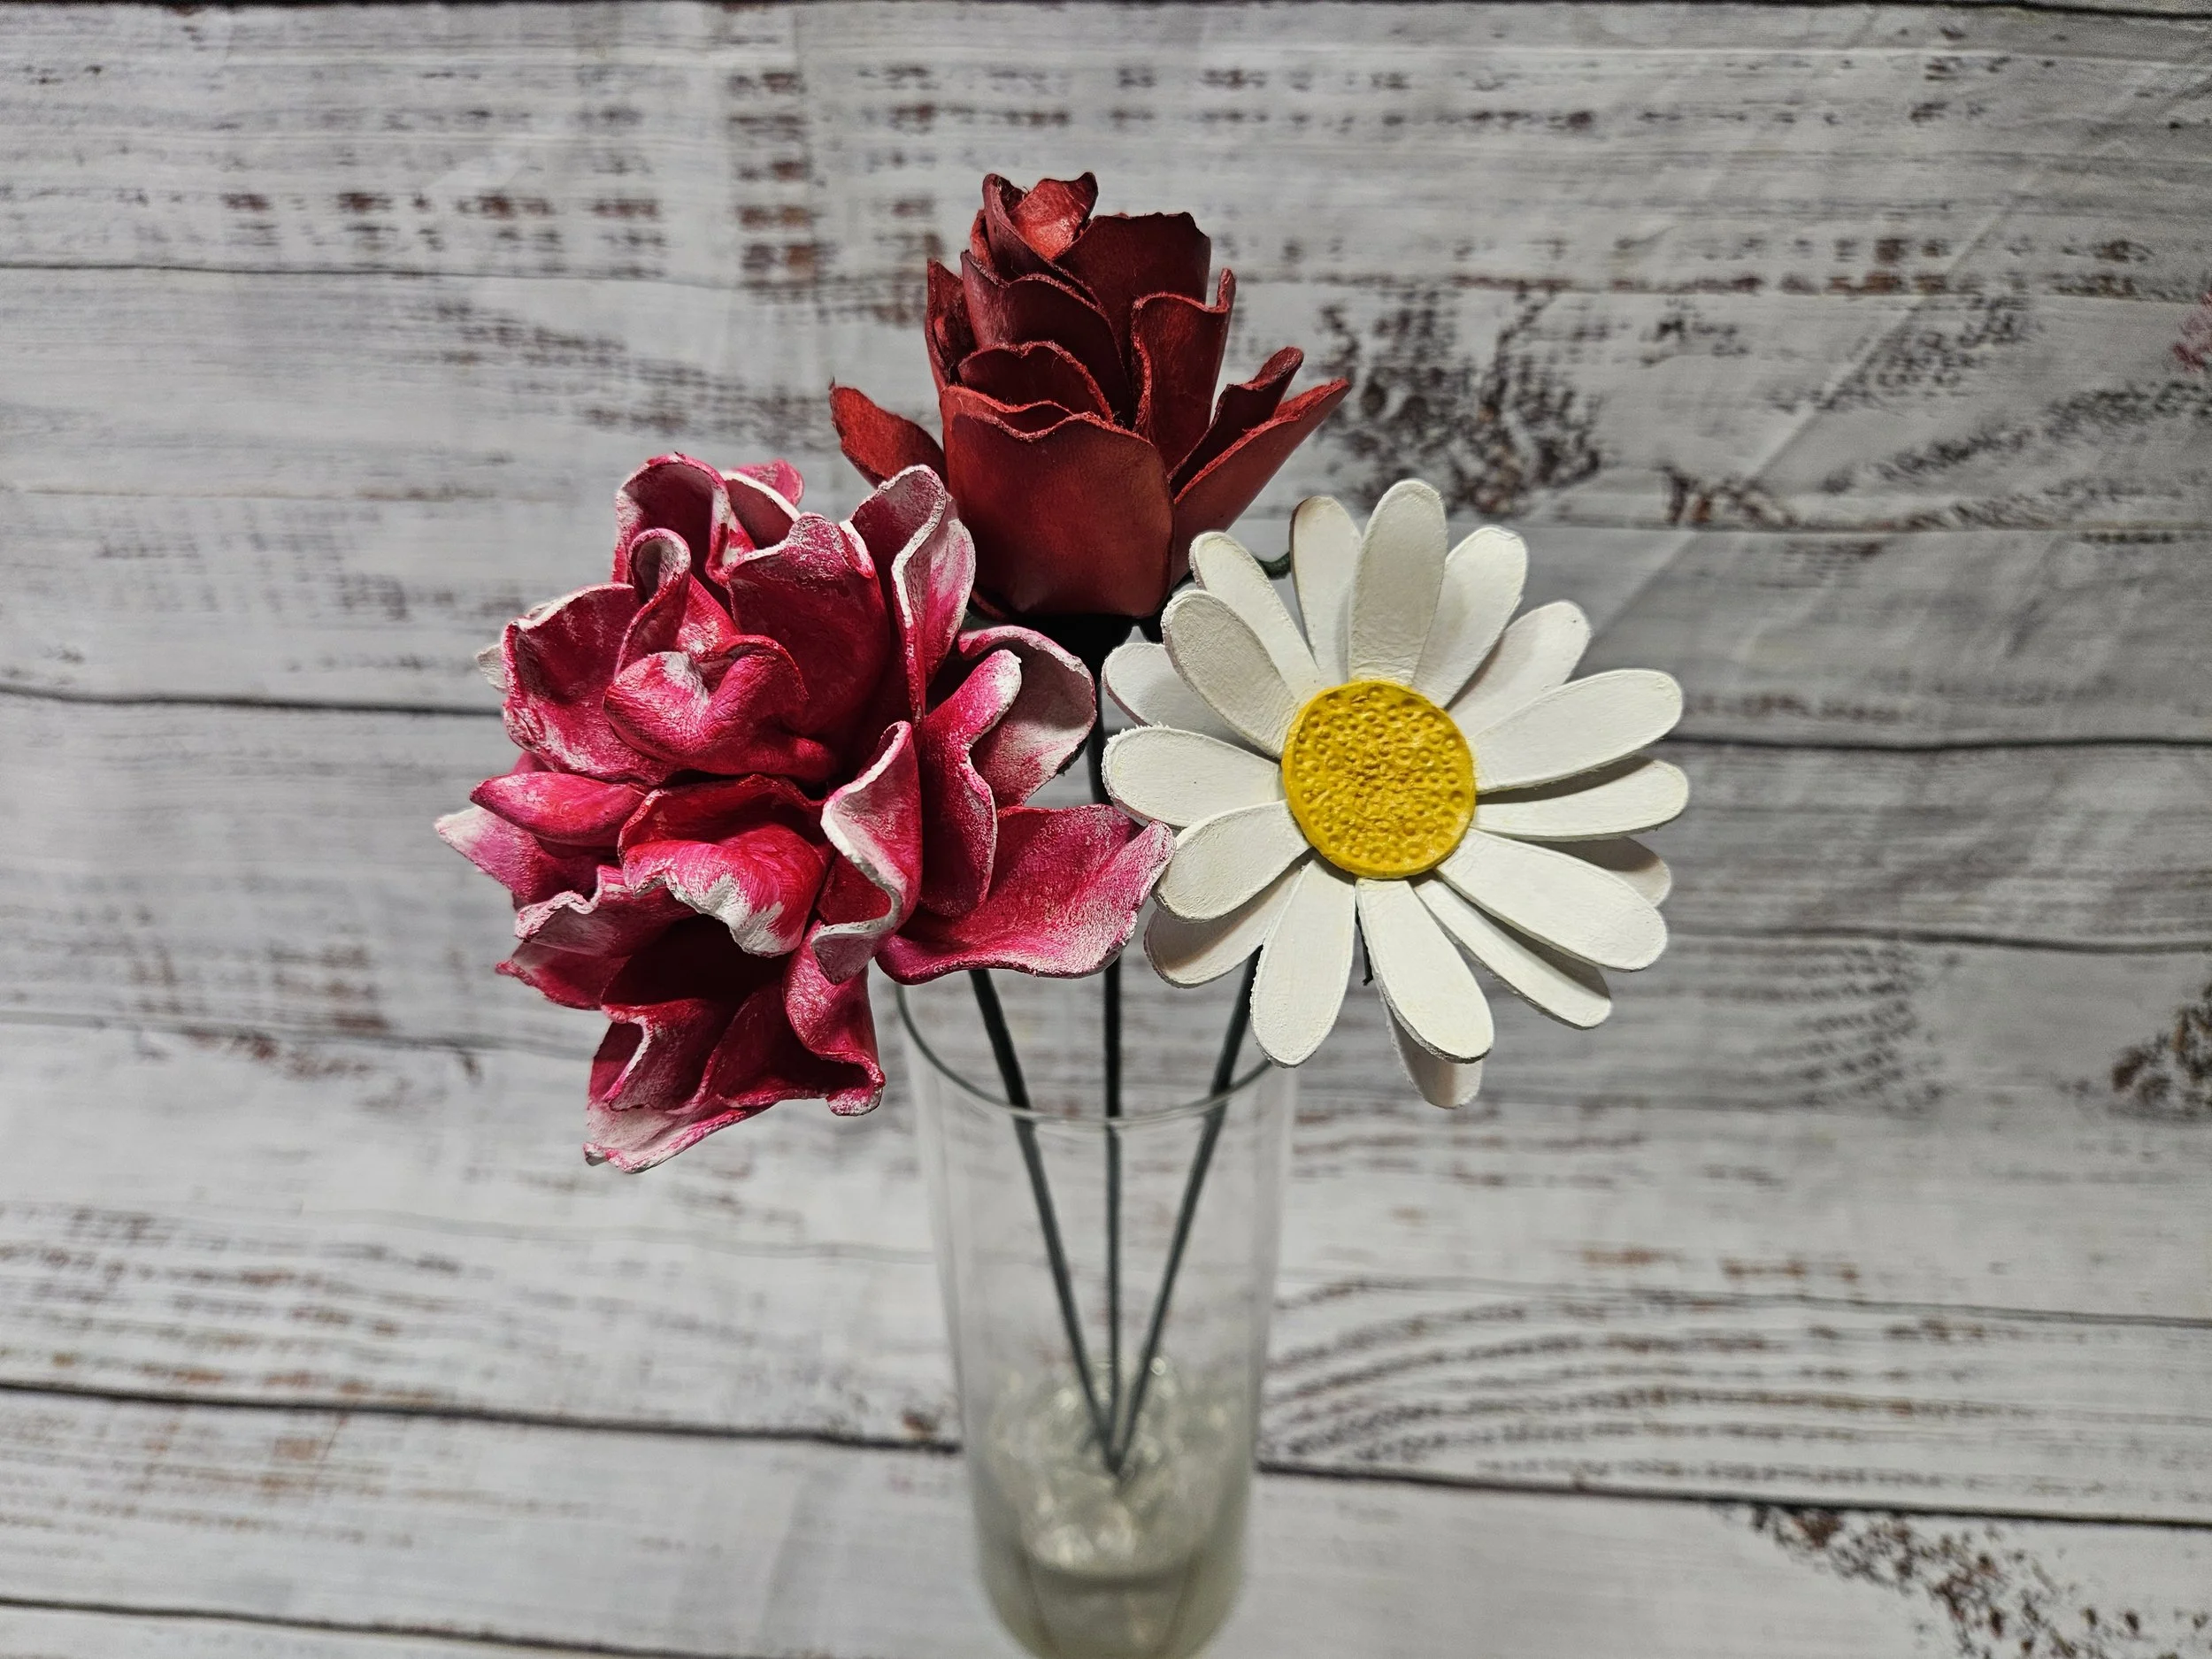
Is anyone else wishing it were spring already? I’m looking forward to those first warm days when I can go around my yard and look for new plants poking their way to the sunshine. I absolutely love bringing fresh flowers into my house and being gifted them by my husband. One thing I hate, though, is that they never last more than a week. That’s why I decided I would make some flowers that I could display forever!
Today I wanted to share with you how I made these leather flowers. I’ve written out my basic design process below, but if you’re more of a visual learner, you can follow along with the video tutorial below.
To begin you’ll need a flower pattern pack from my shop, you can snag one here. The pattern pack includes templates and more detailed step by step instructions with pictures.
In addition, you’ll need leather, dye or paint in the colors of your choice, thick super glue or rubber cement, 18 gauge floral wire (4 per flower), floral tape, and leather sealant. For the leather, be sure to use 2-3 ounce unfinished vegetable tanned leather. Other tanning types or finishes will hinder the leather’s ability to wet form.
For tools, I suggest you have a leather knife or scissors, a swivel knife, a stylus, a small circle stamp, a paint brush or dye dauber, a small hole punch, and wire snippers/plyers.
After deciding which flowers I wanted to use, I grabbed images and created templates using digital drawing software. Then I used my Cricut to cut out my petals and their leaves, but if you don’t have an automated cutting machine you can just use the cutting tool you have on hand.
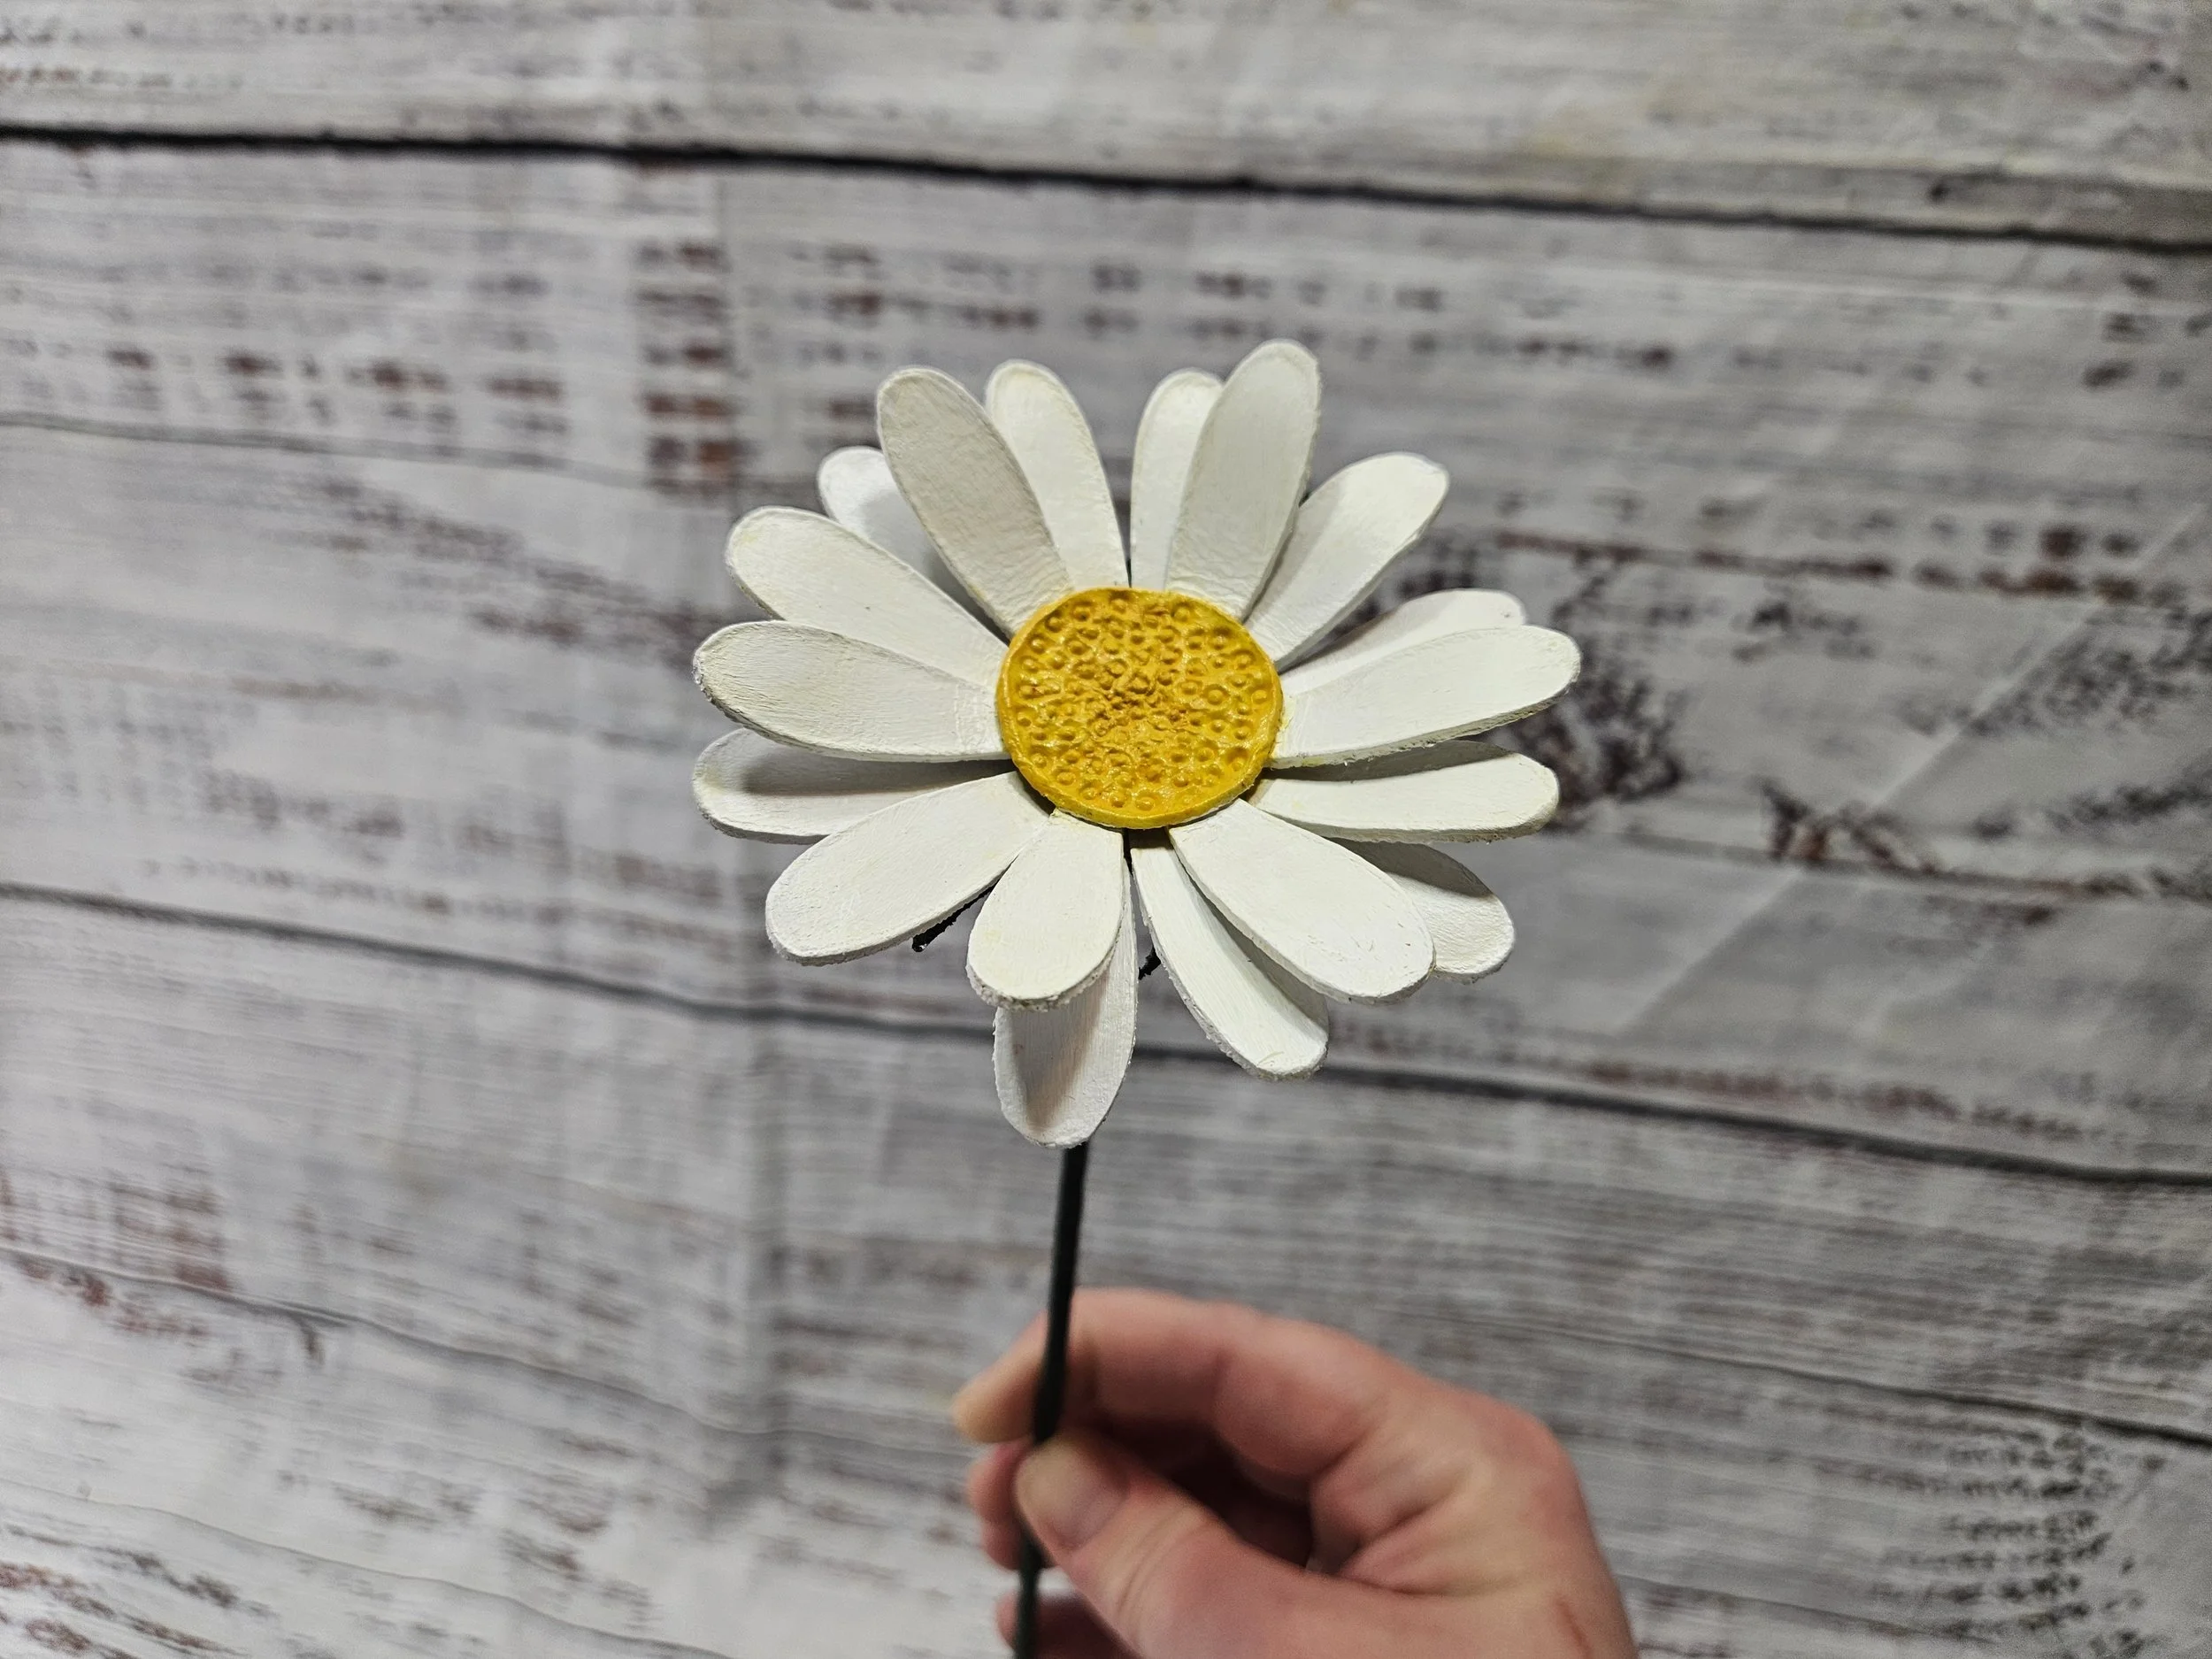
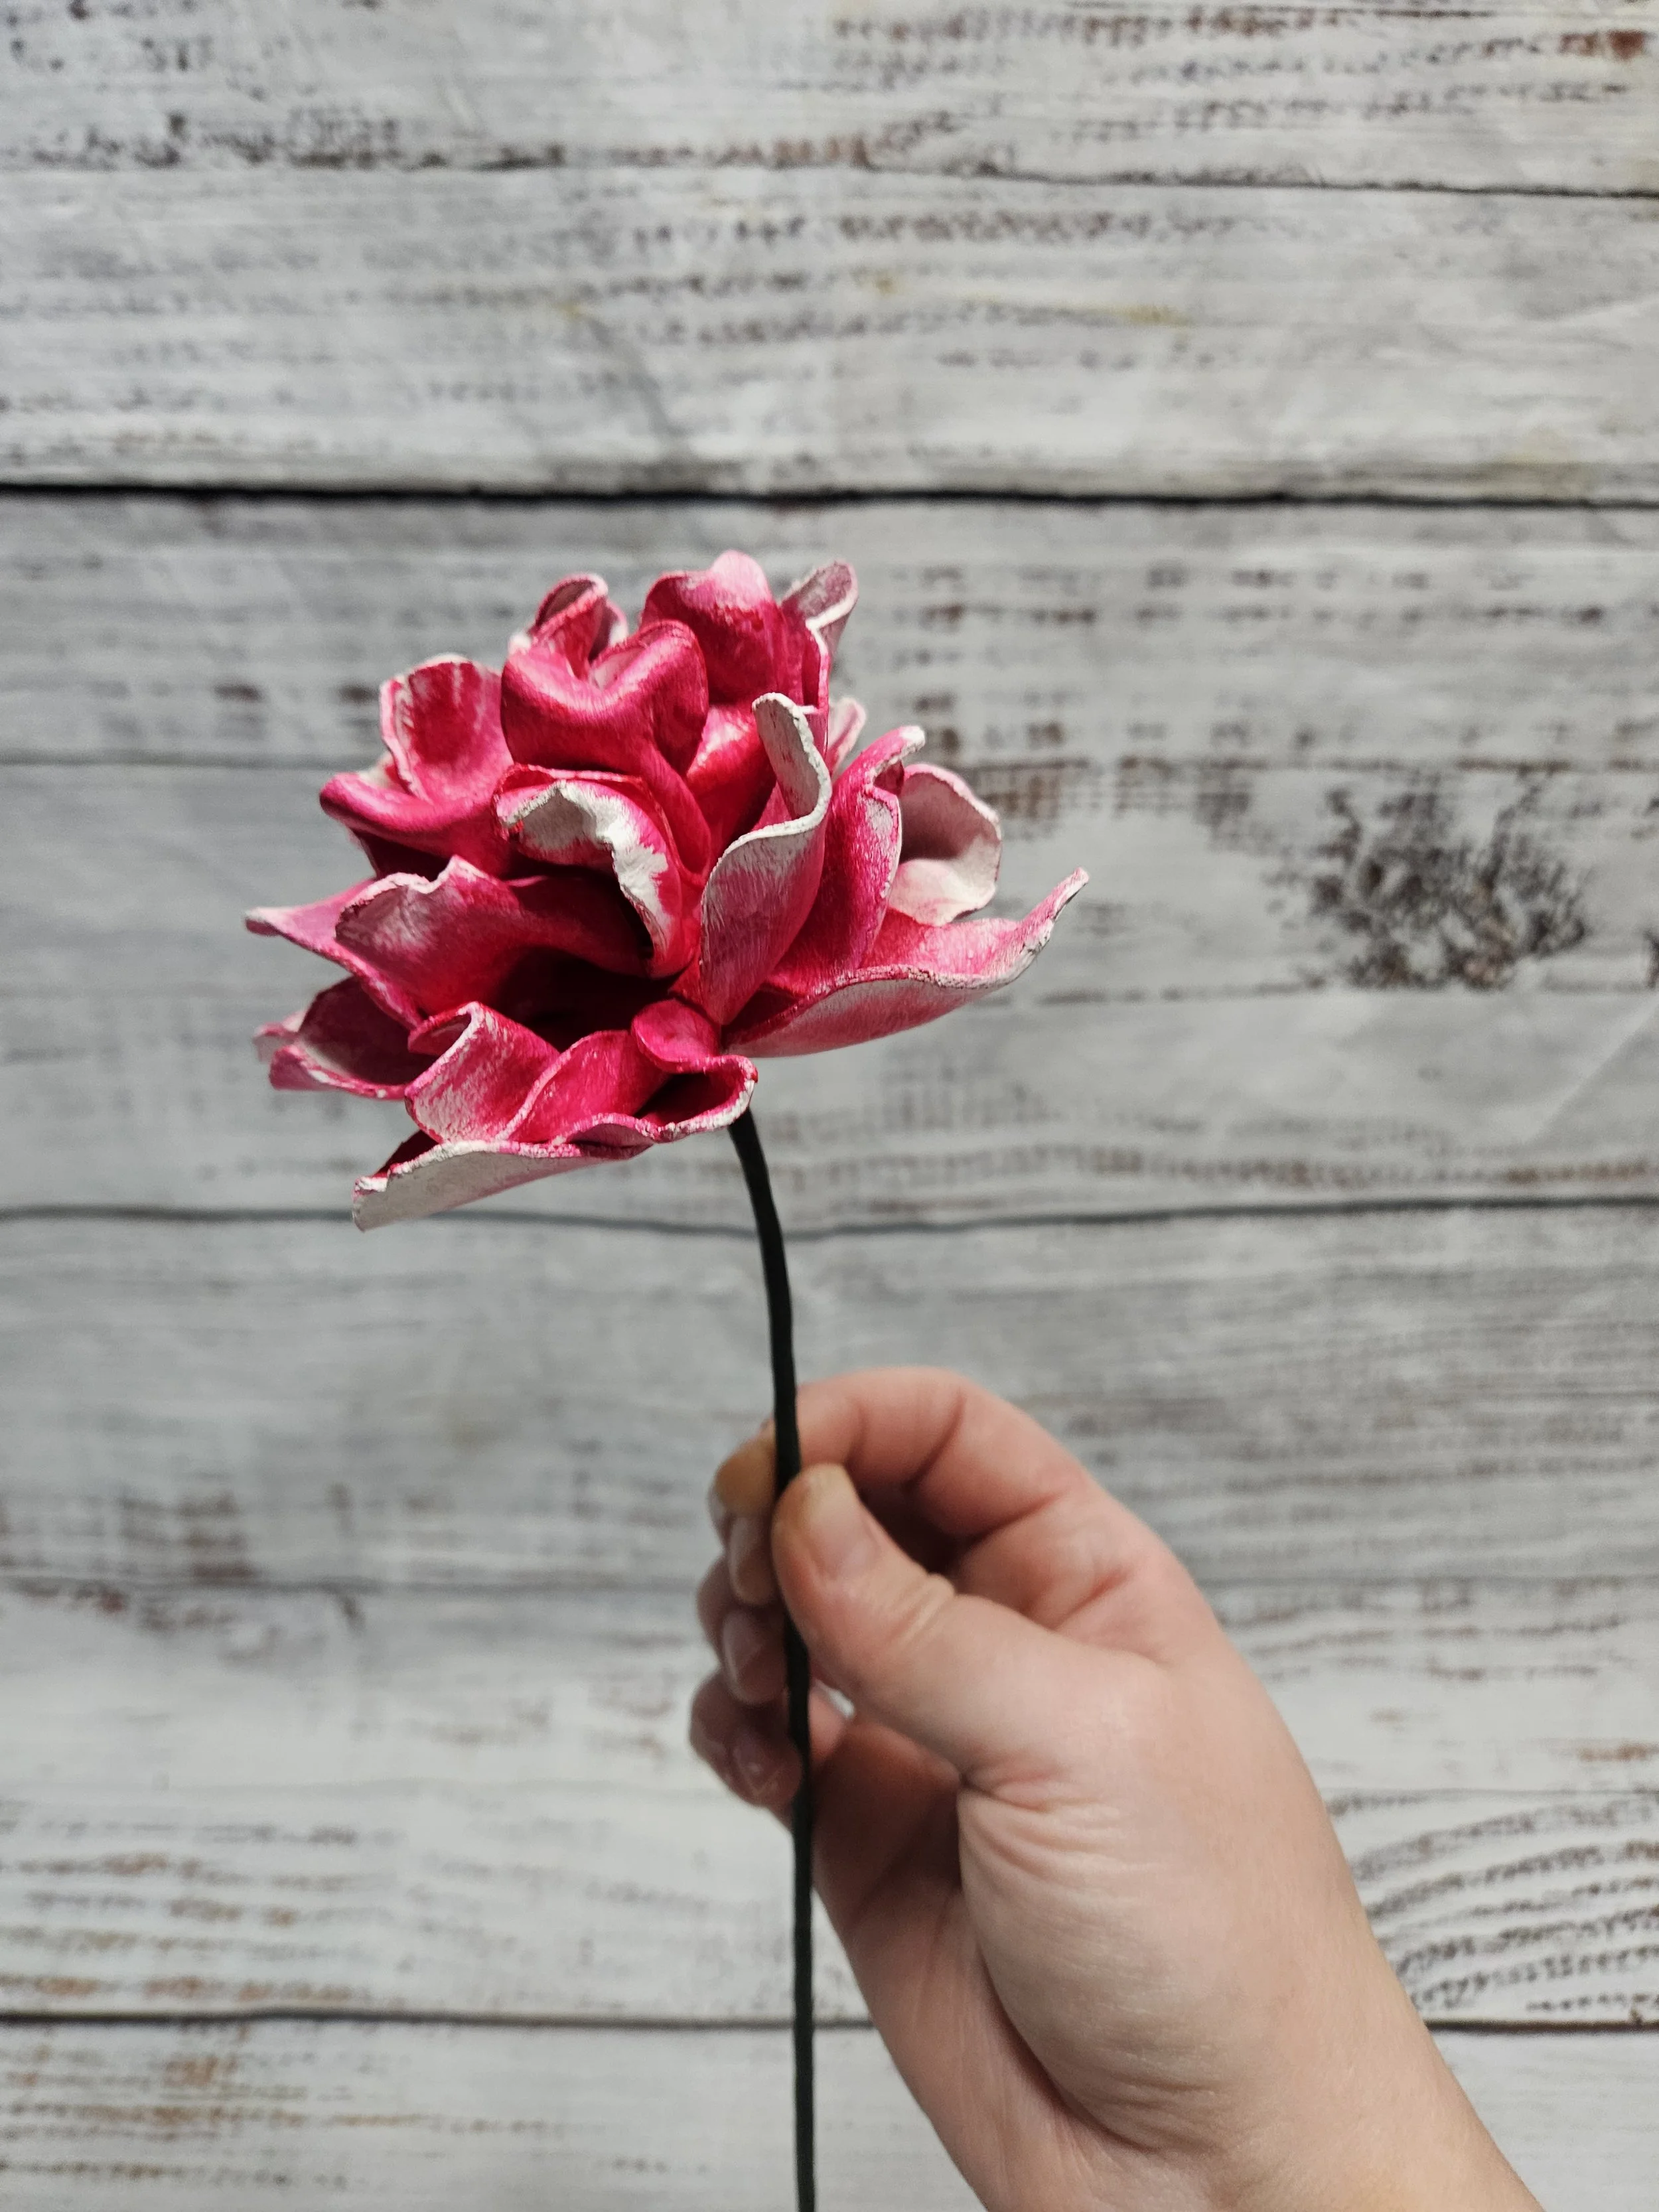
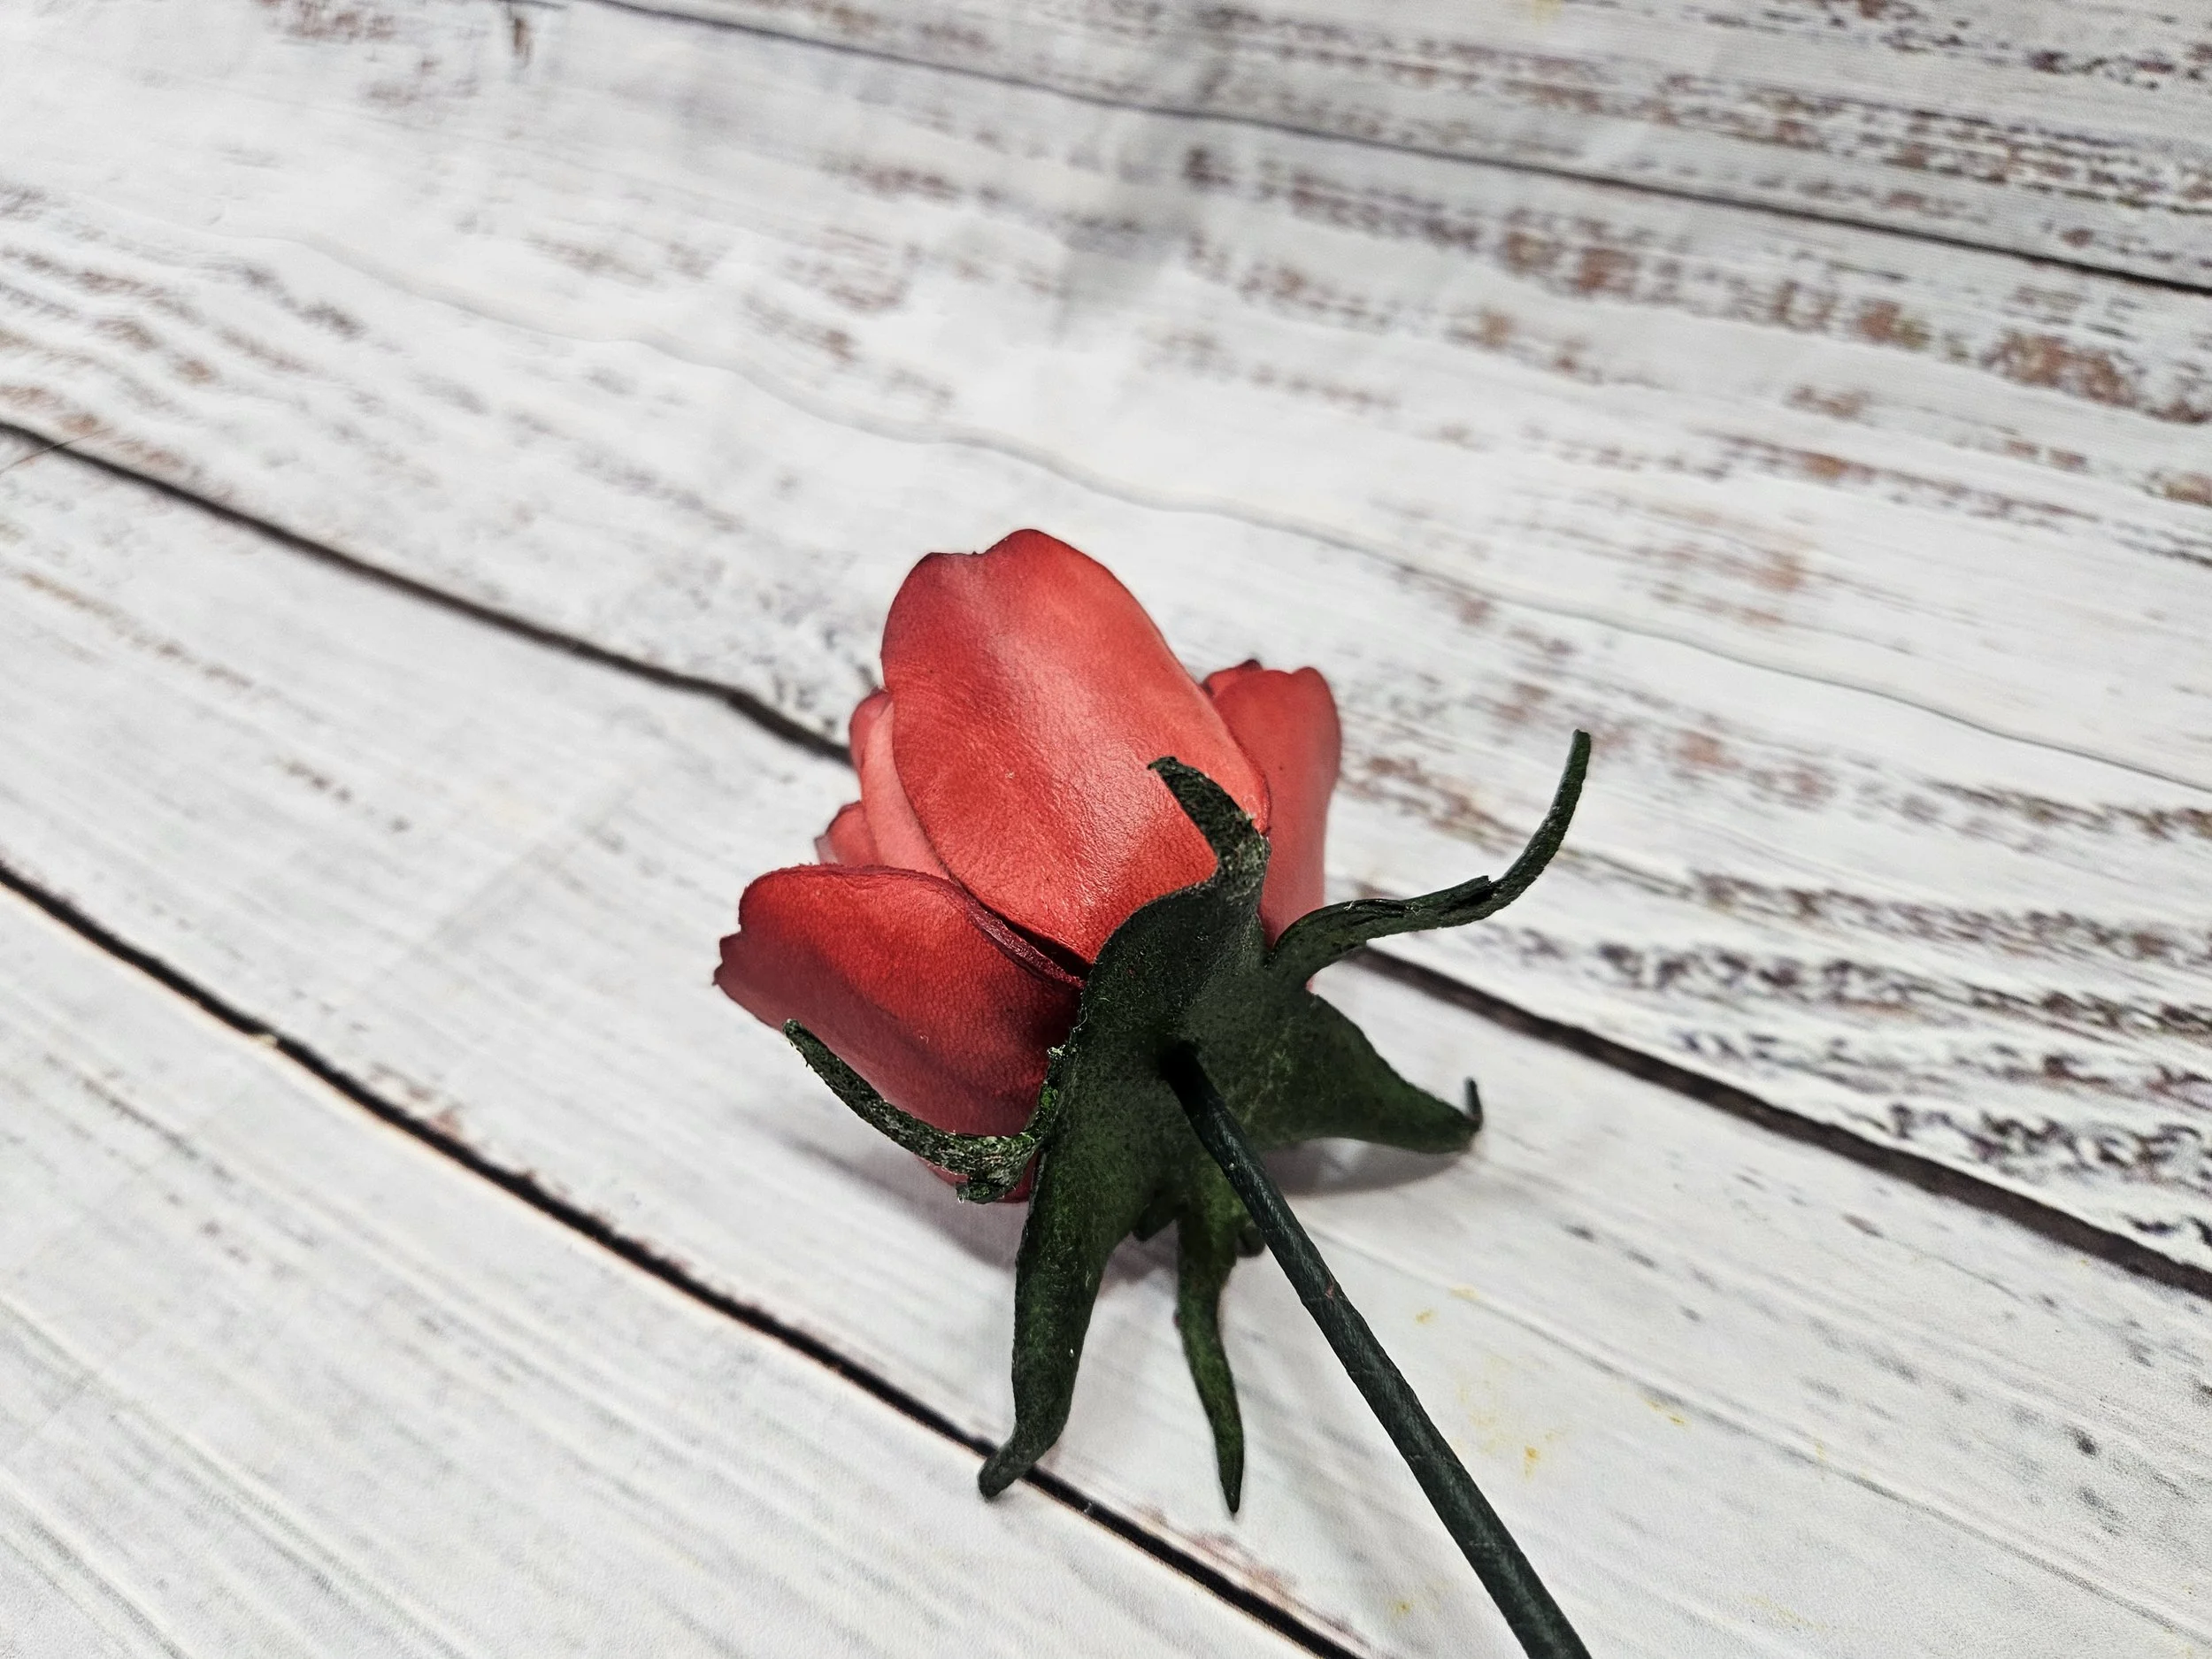
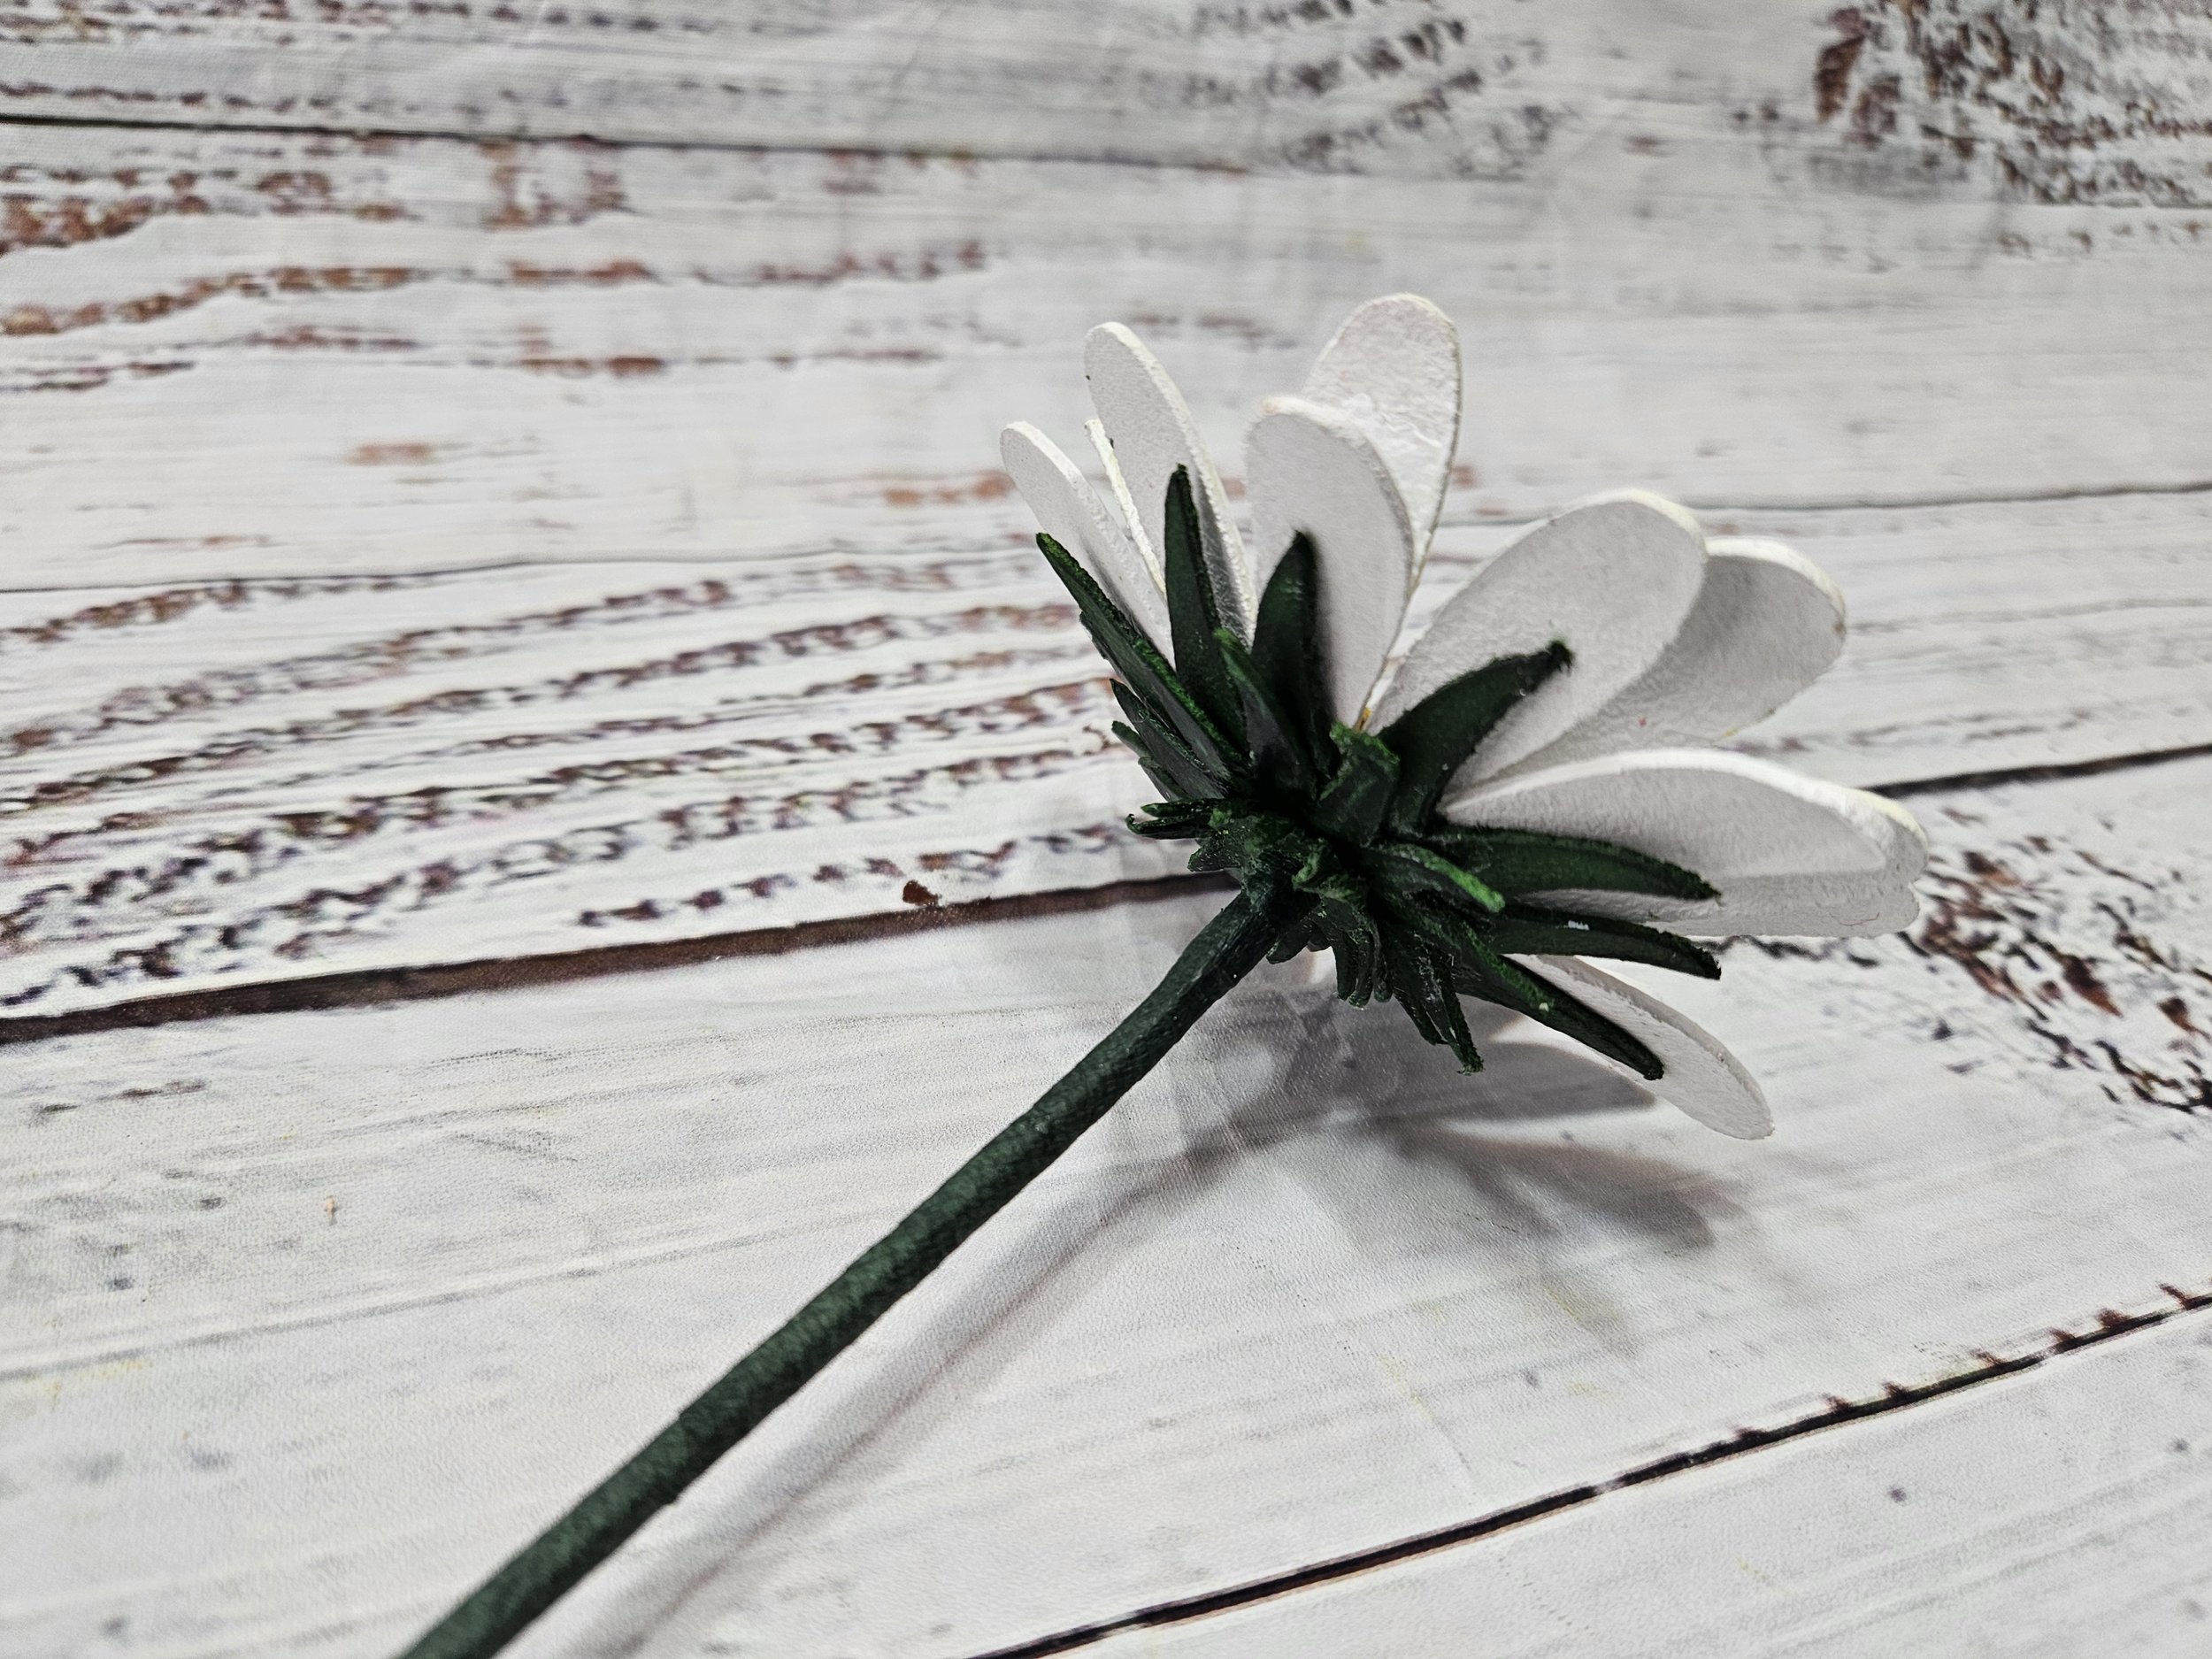
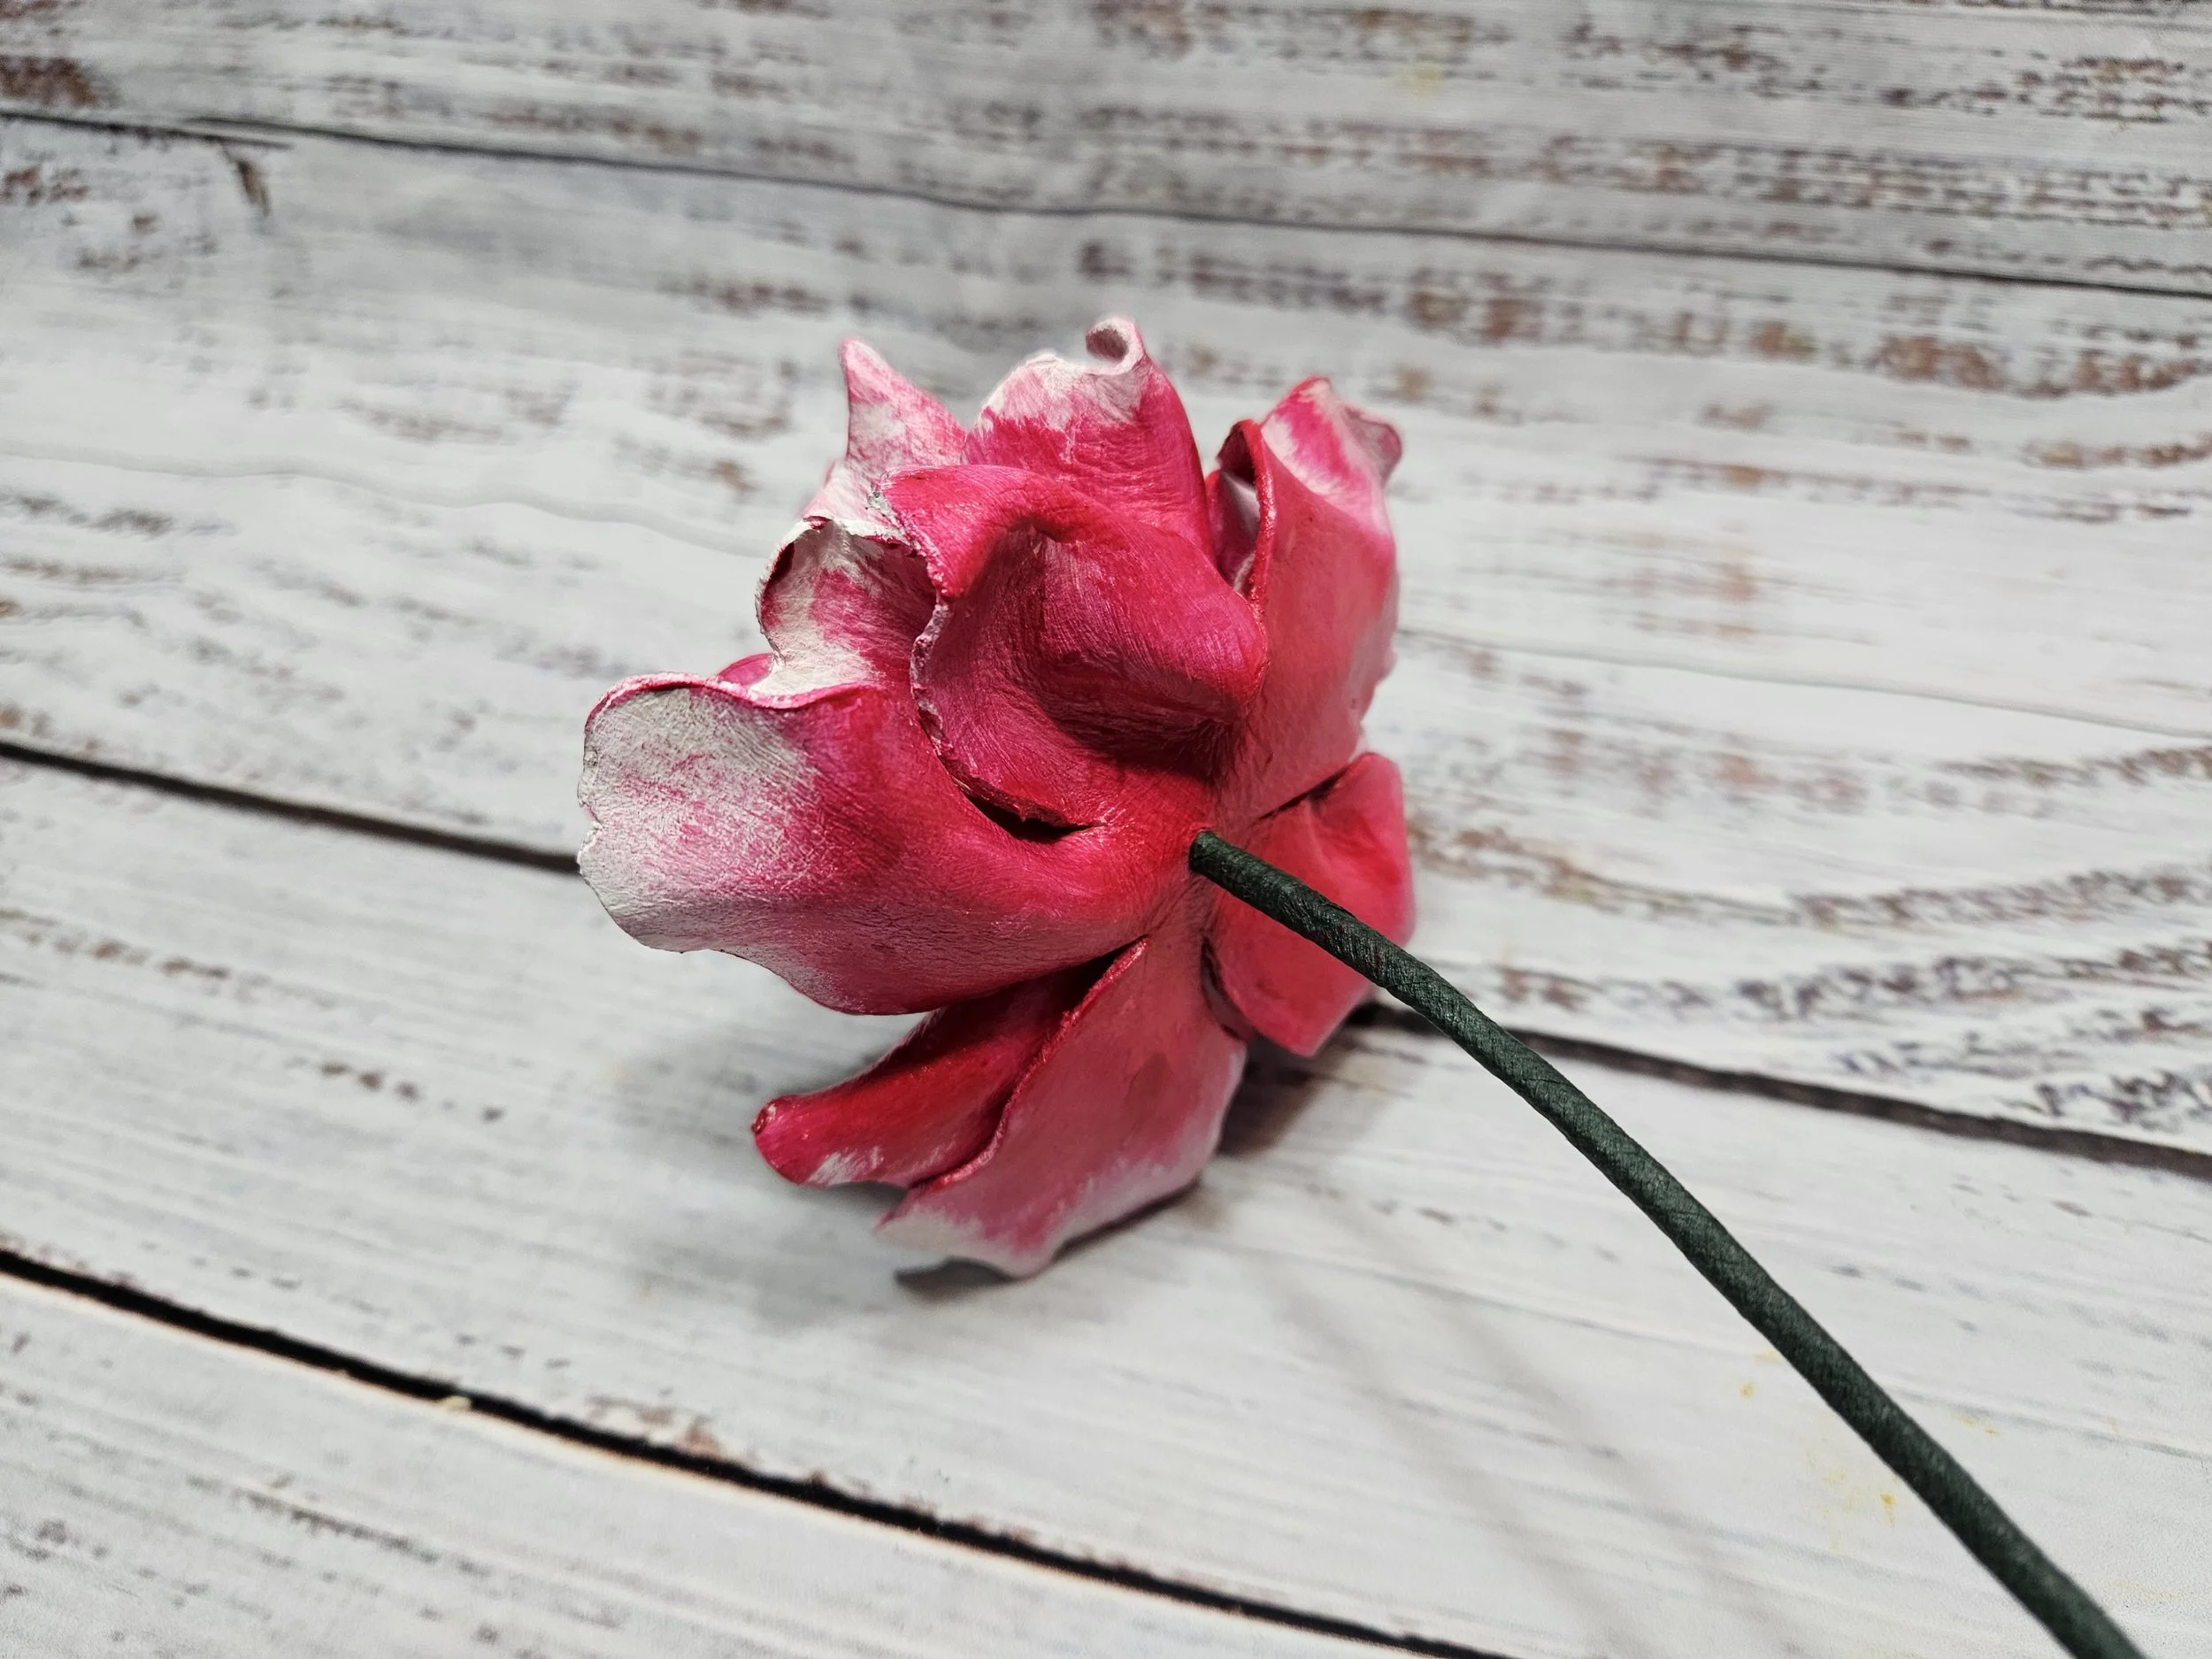
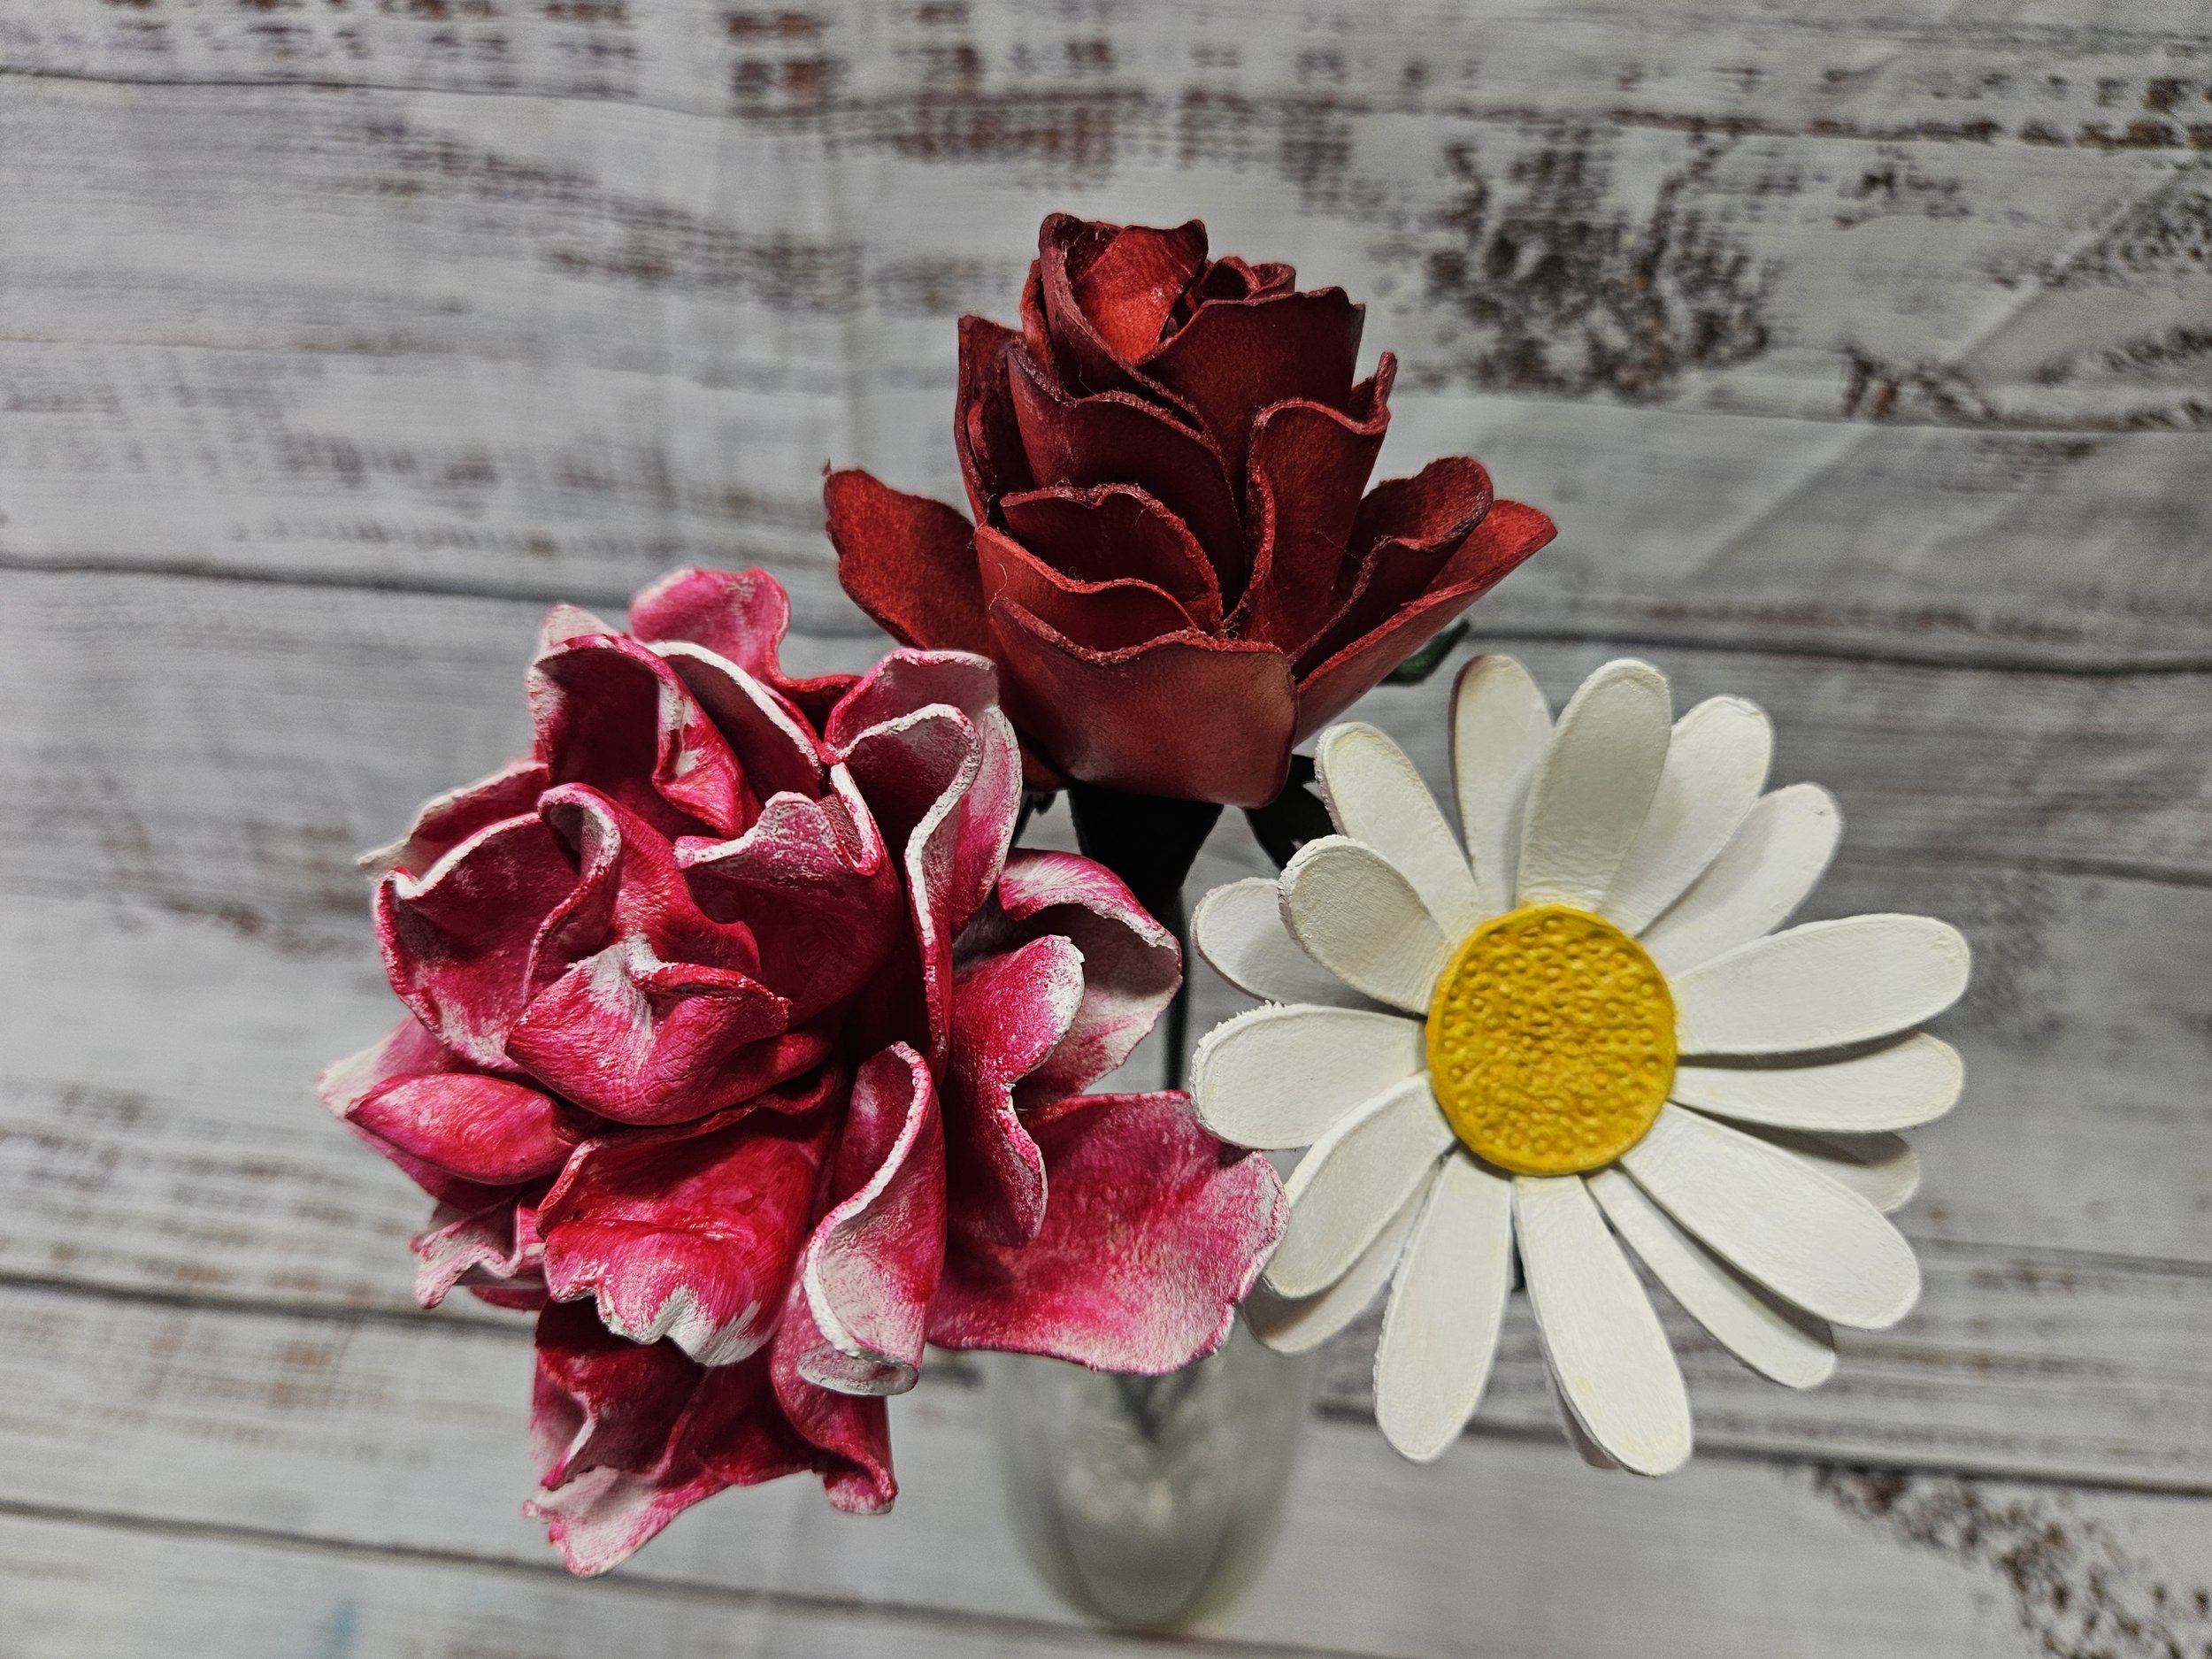
Next, I gave everything a nice bath to case the leather and ready it for the next step in the process. Once the leather was properly cased, I used a small circle stamp to simulate the pattern at the center of the daisy. Then I grabbed my rose leaf and using my swivel knife, I added the veining pattern to the edges of each leaf. For the peony, I crumpled up the edges of each petal and smooshed them all together and then laid them off to the side to dry. For the rose, I did something similar, but instead I curled each petal around one another to create that iconic rose shape.
Once all my petals were all wet-forming, I started to work on the stems. I found that a single piece of floral wire was not thick enough, so I bundled four pieces together. Then I used floral tape and just wrapped it around the edge going in a spiral downward and that created my stem for each of the flowers.
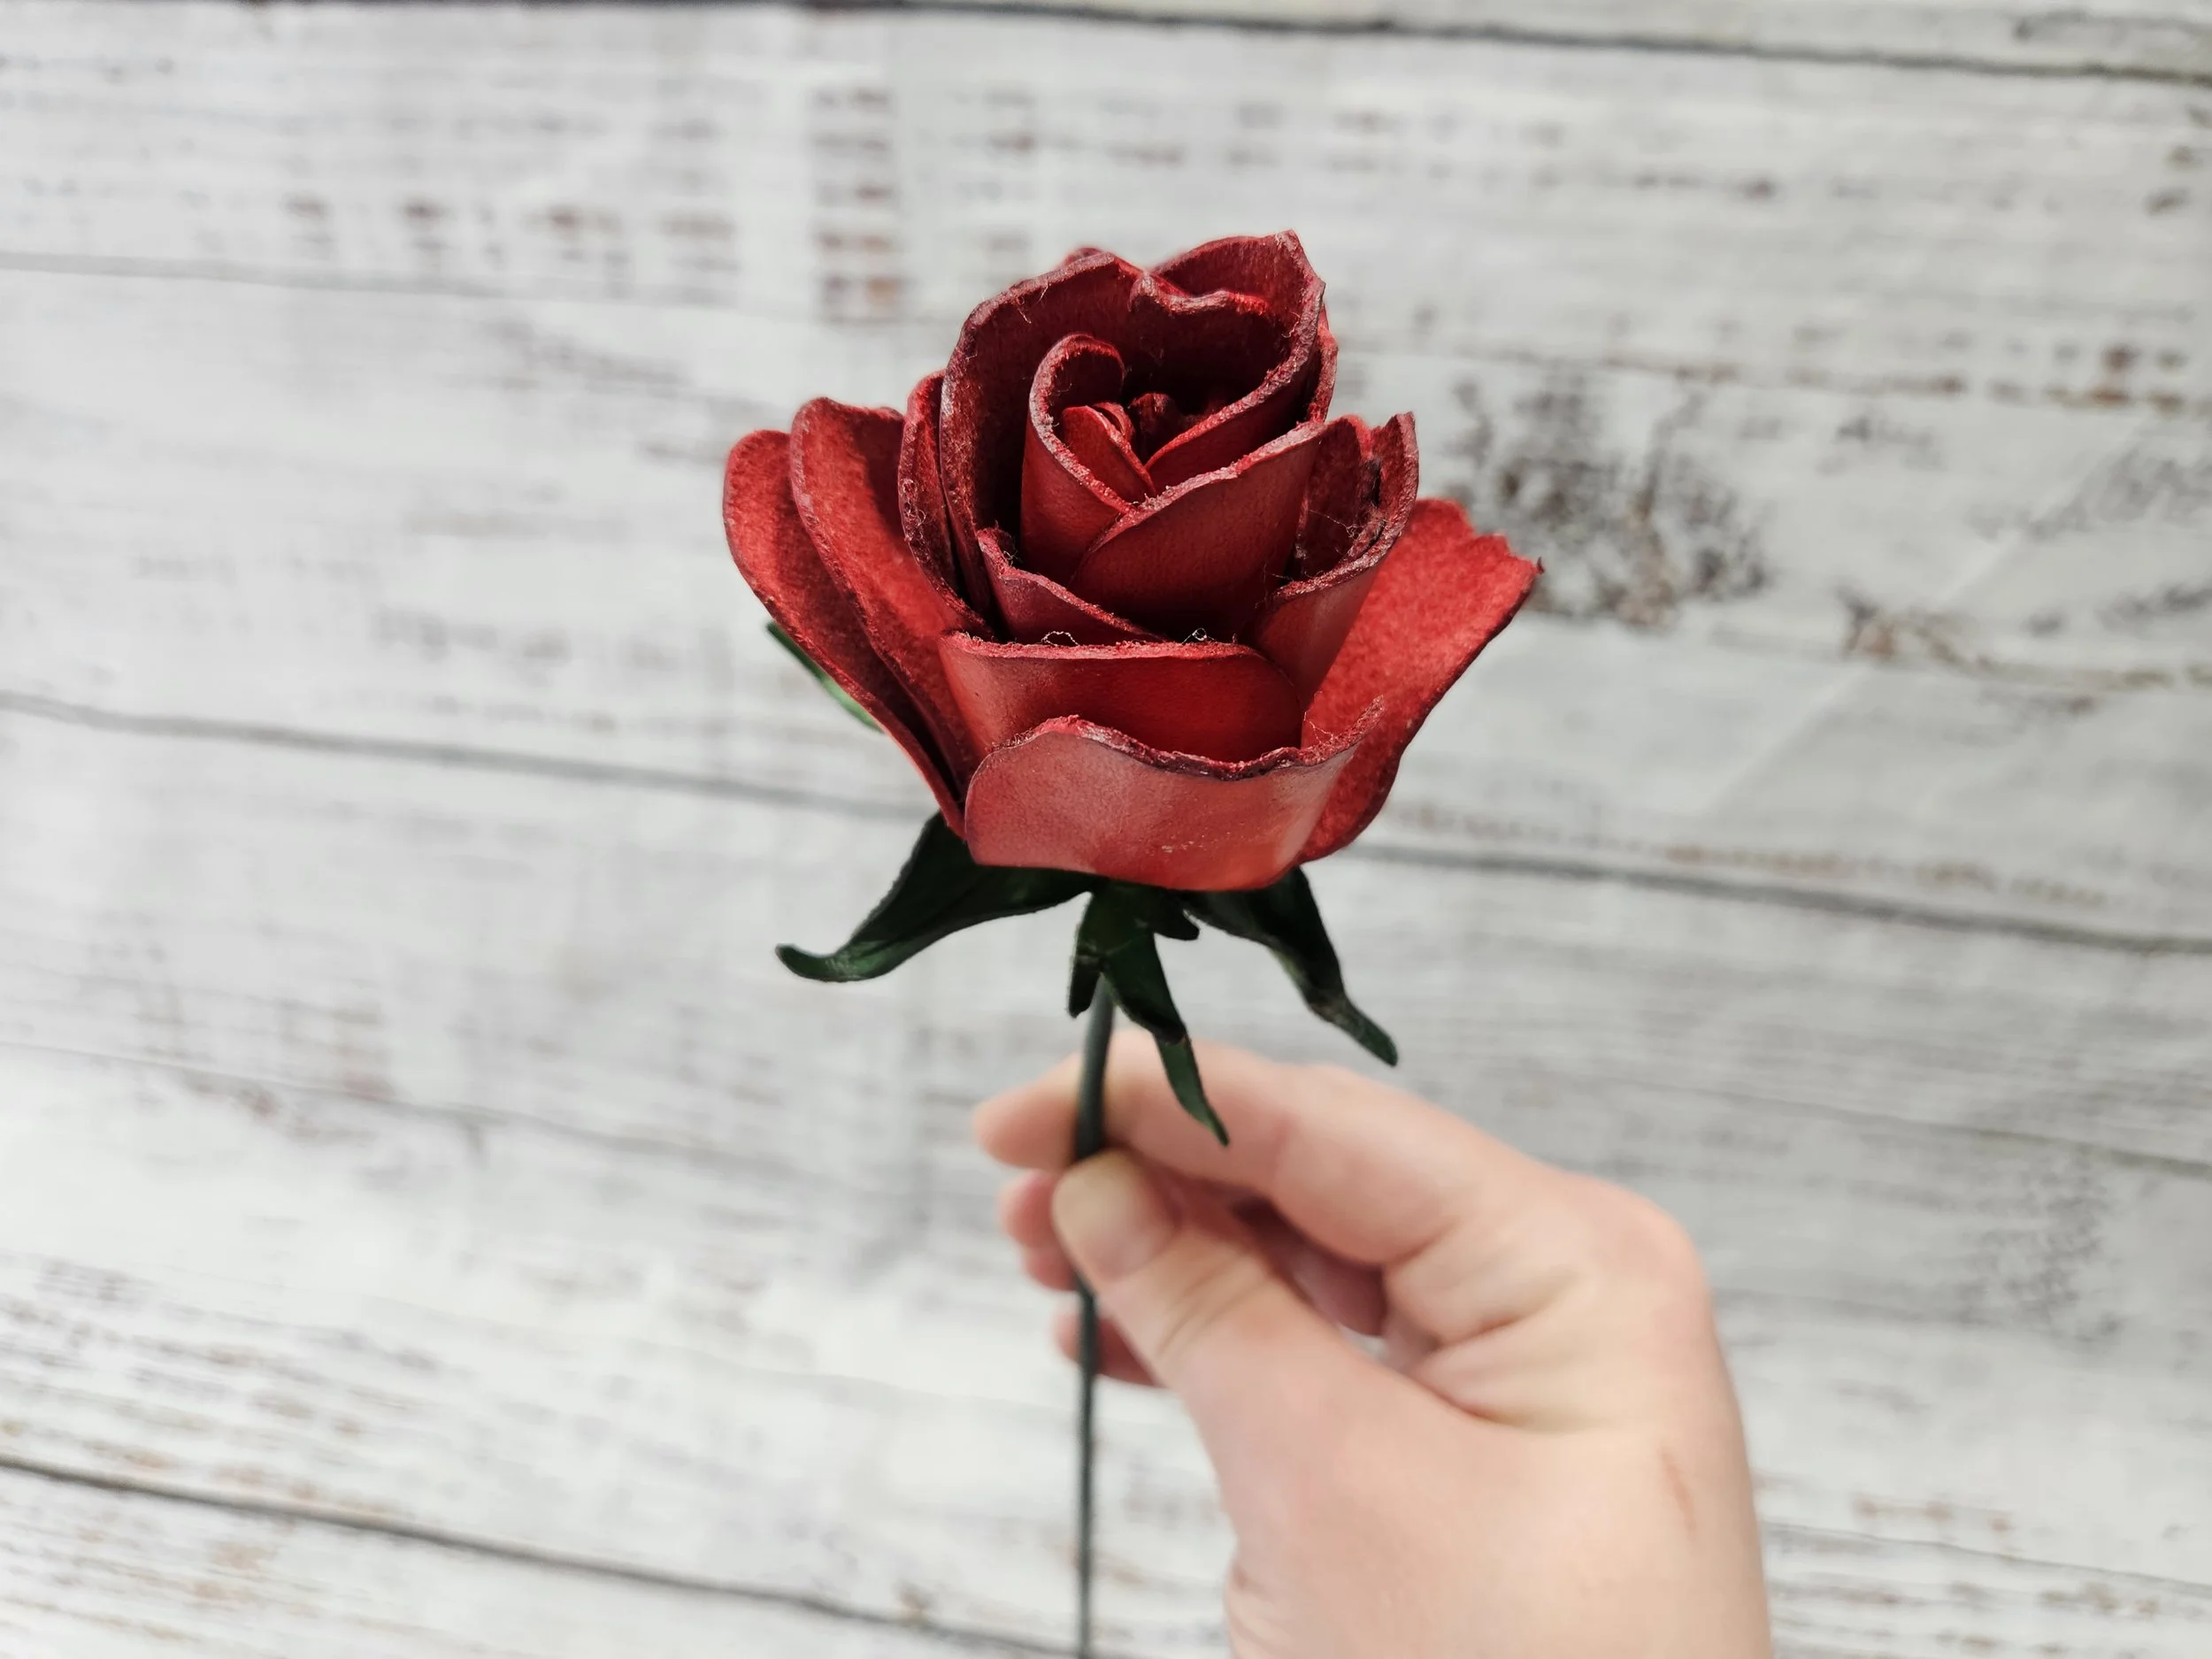
To start with color, I went into each of the leaf pieces and dyed them green. For the daisy, I painted the petals white on each of the layers. Then for the peony, I went in with white on the tips of each petal. I also added pink at the base of each petal and integrated it in with the white to create an ombre effect. For the rose, I decided to go traditional and used a nice deep red, making sure to layer it up to get a rich color.
Next, for each of the flowers, I used my hole punch and created a hole in the center that was just large enough for the stem to fit through. I did this for every piece, except for the center of the daisy.
To attach the peony flower to the stem, I simply just slid the petals on one at a time, adding a layer of glue each time. I'm just using some thick Gorilla super glue. No need to add glue to the bottom, the floral tape acts as a stopper so that the flower doesn't slide down the stem. Then I used needle nose pliers to hold everything in place to let it dry for a moment. Then I clipped off the excess floral wire and curled in the ends so there aren’t sharp ends poking up.
For the daisy, I did a very similar process to what I did with the peony. Starting with the smallest leaf, I worked my way up to the biggest leaf. Then I added the layers of petals, shifting them a little bit on each layer. Once all my petals were on, I used pliers to snip off the excess stem. Then I bent the ends so that they were flat up against the petals away from the center to create some more stability. For the center of the daisy, I added a thin layer of glue to the back, then placed it directly on top of the excess stem pieces to hide those, and held it in place for a bit to make sure that it was secure.
For the rose, again, I did pretty much the same process. I started with the rose leaf, then added each petal largest to smallest, with glue between each layer. Then, just like with the peony I used pliers to hold the layers in place, then clipped the ends and rolled them inward.
Thank you for joining me today, and as always, life’s better with leather!
jess
Drop me a comment below, I’d love to chat! Never miss a post, hit the subscribe button AND get 10% off your first order!